Overview
The Wizards in the Code Editor module are designed to assist users in setting up new projects quickly and efficiently. When a user clicks on "New" in the File Menu, a popup Wizard window appears, guiding them through the initial setup process.
Step-by-Step Process
Step 1: Choose Indicator
In this initial step, the user selects the type of project they want to create. The options include Indicator, Strategy, Money Management, and Trade Exit Signal. For this guide, we will focus on creating an Indicator.

Step 2: General Settings
In the General Settings step, the user inputs the basic properties of the indicator:
- Name: The name of the indicator.
- Description: A brief description of what the indicator does.
- Copyright: The copyright information for the indicator.
- Version: The version number of the indicator.
- Calculation Mode: Options include "On bar open", "On each tick", or "On price change".
- Input Data Type: Options include "Bars", "Single series", or "No data needed".

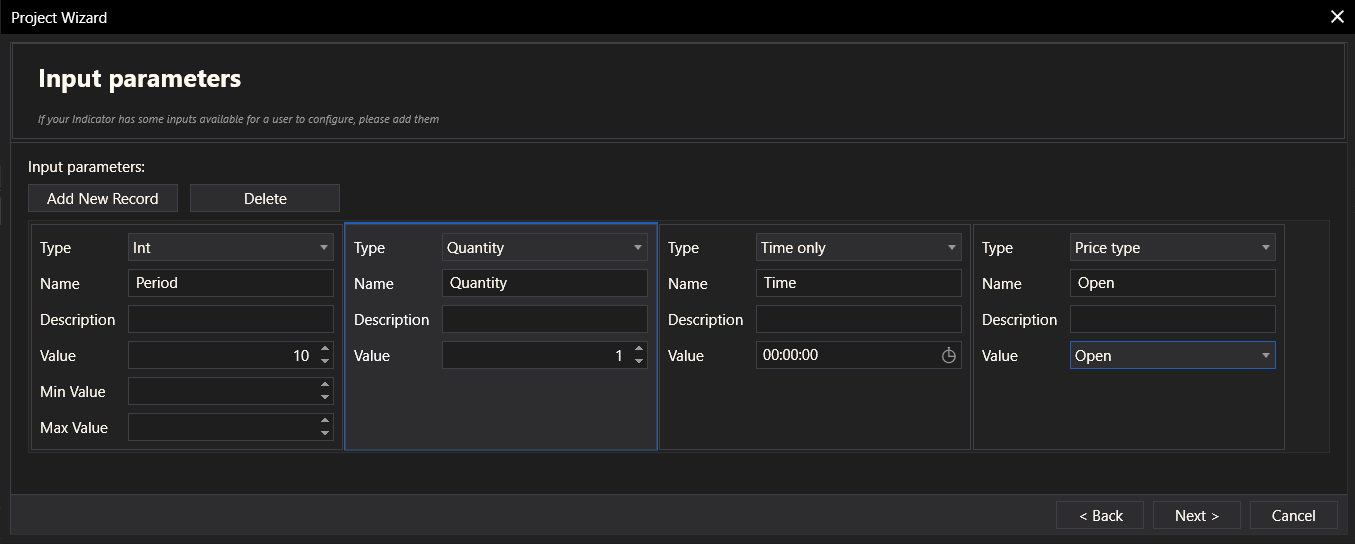
Step 3: Input Parameters
In this step, the user can add or delete input parameters for the indicator. Each parameter includes:
- Type: Options such as String, Int, Double, Quantity, Boolean, Date and Time, Time only, Time span, Color, Price type.
- Name: The name of the parameter.
- Value: The default value of the parameter.
- Min Value and Max Value: The range for numerical parameters.
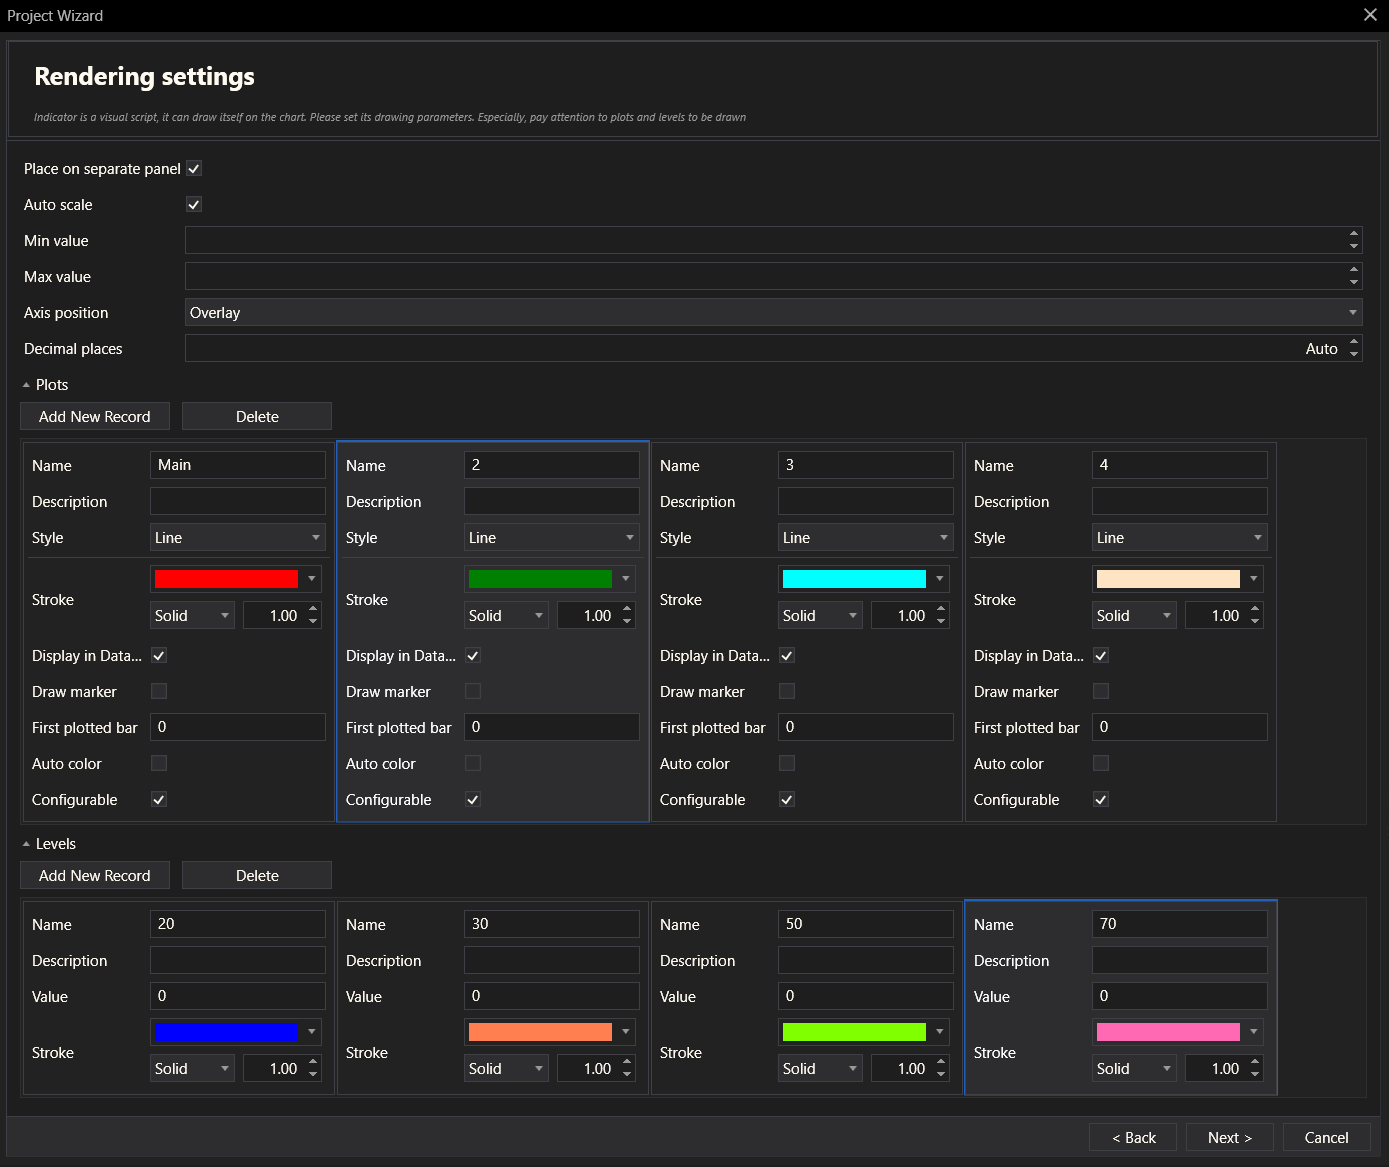
Step 4: Rendering Settings
The Rendering Settings step allows the user to define how the indicator is visually represented:
- Min Value and Max Value: The range of values displayed.
- Axis Position: Options include "Overlay", "Left", "Right".
- Decimal Places: Number of decimal places for values.
- Plots: Allows adding or deleting plot configurations.
- Levels: Allows adding or deleting level configurations.
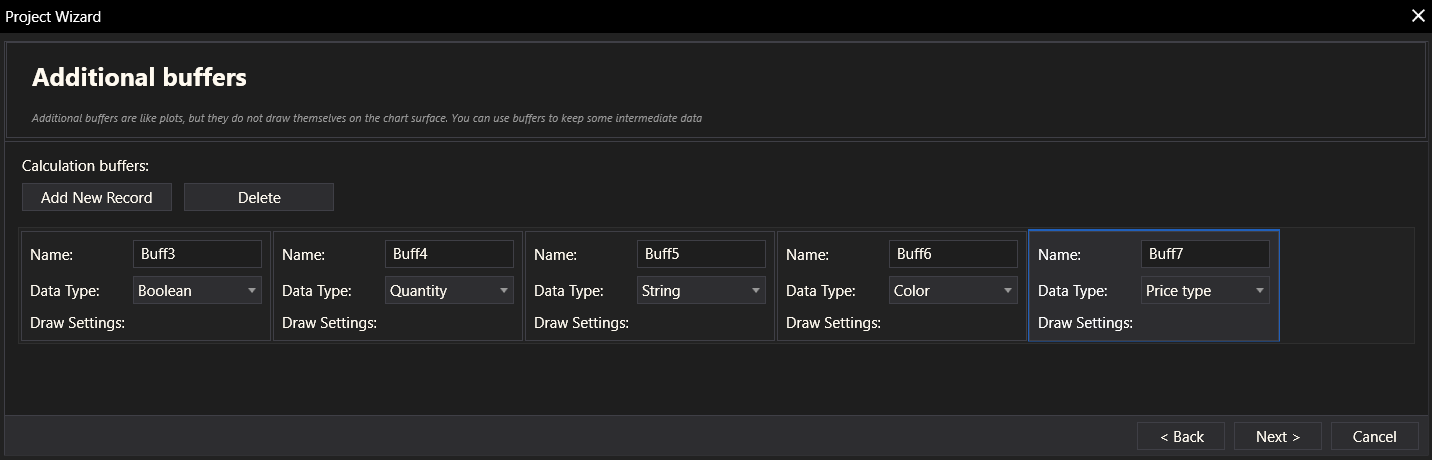
Step 5: Additional Buffers
Users can add or delete additional calculation buffers. Buffers are used for intermediate data storage during calculations.
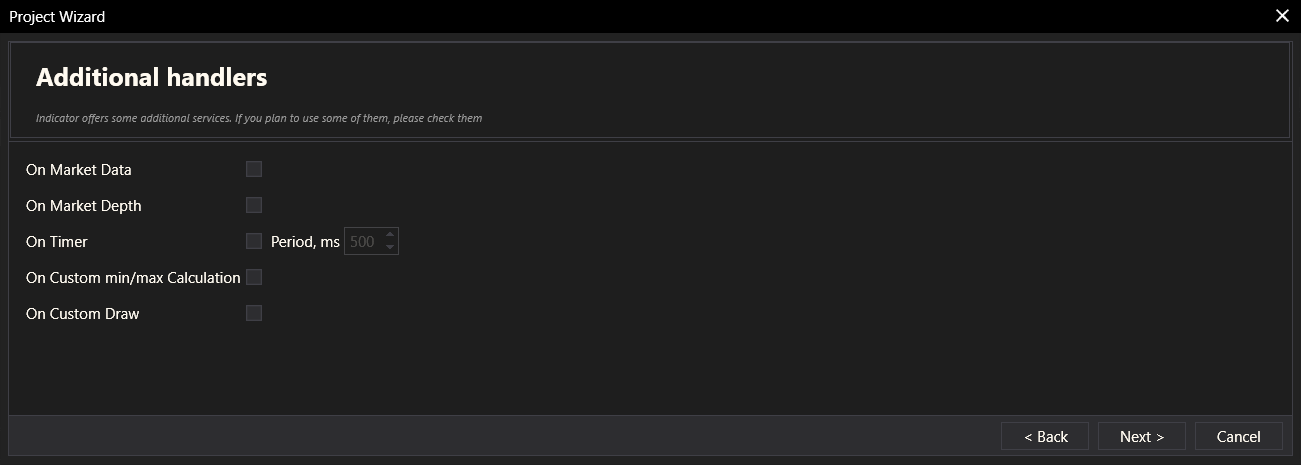
Step 6: Additional Handlers
This step includes optional handlers for specific data events:
- On Market Data
- On Market Depth
- On Timer
- On Custom min/max Calculation
- On Custom Draw
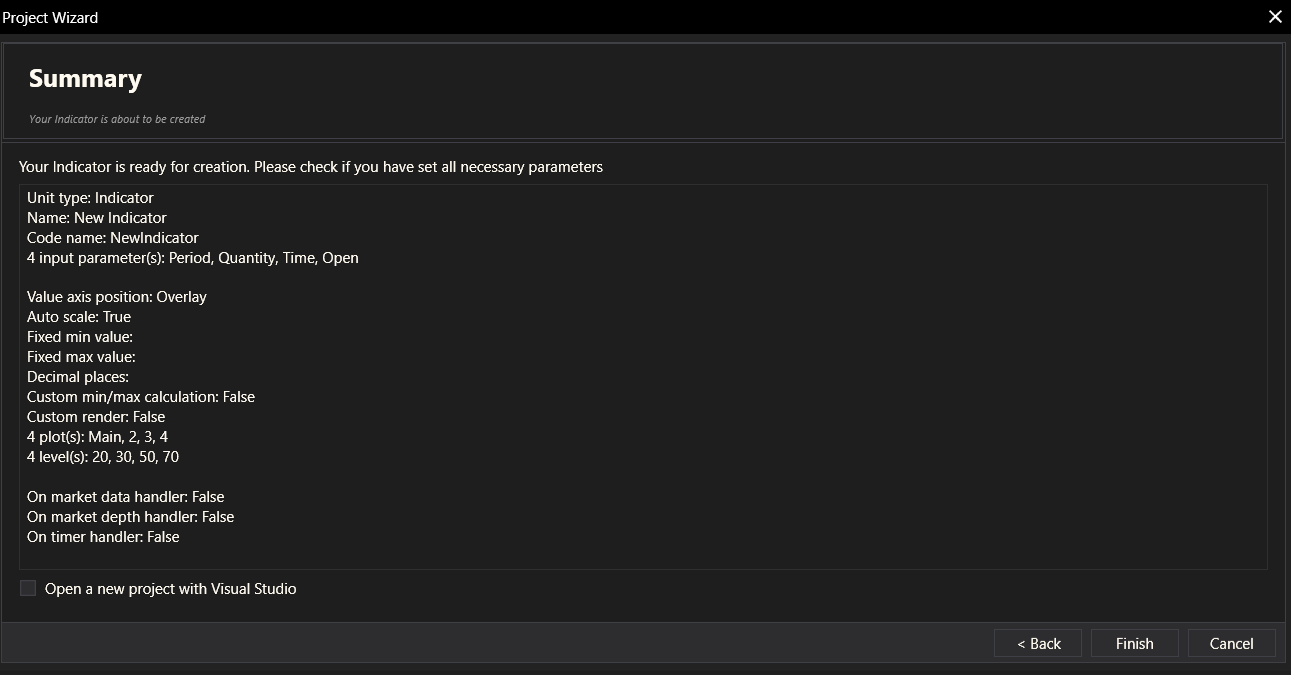
Step 7: Summary
The Summary step provides a final overview of all the settings configured for the indicator. It allows users to review their choices before the indicator is created. There is also an option to open the project in Visual Studio.
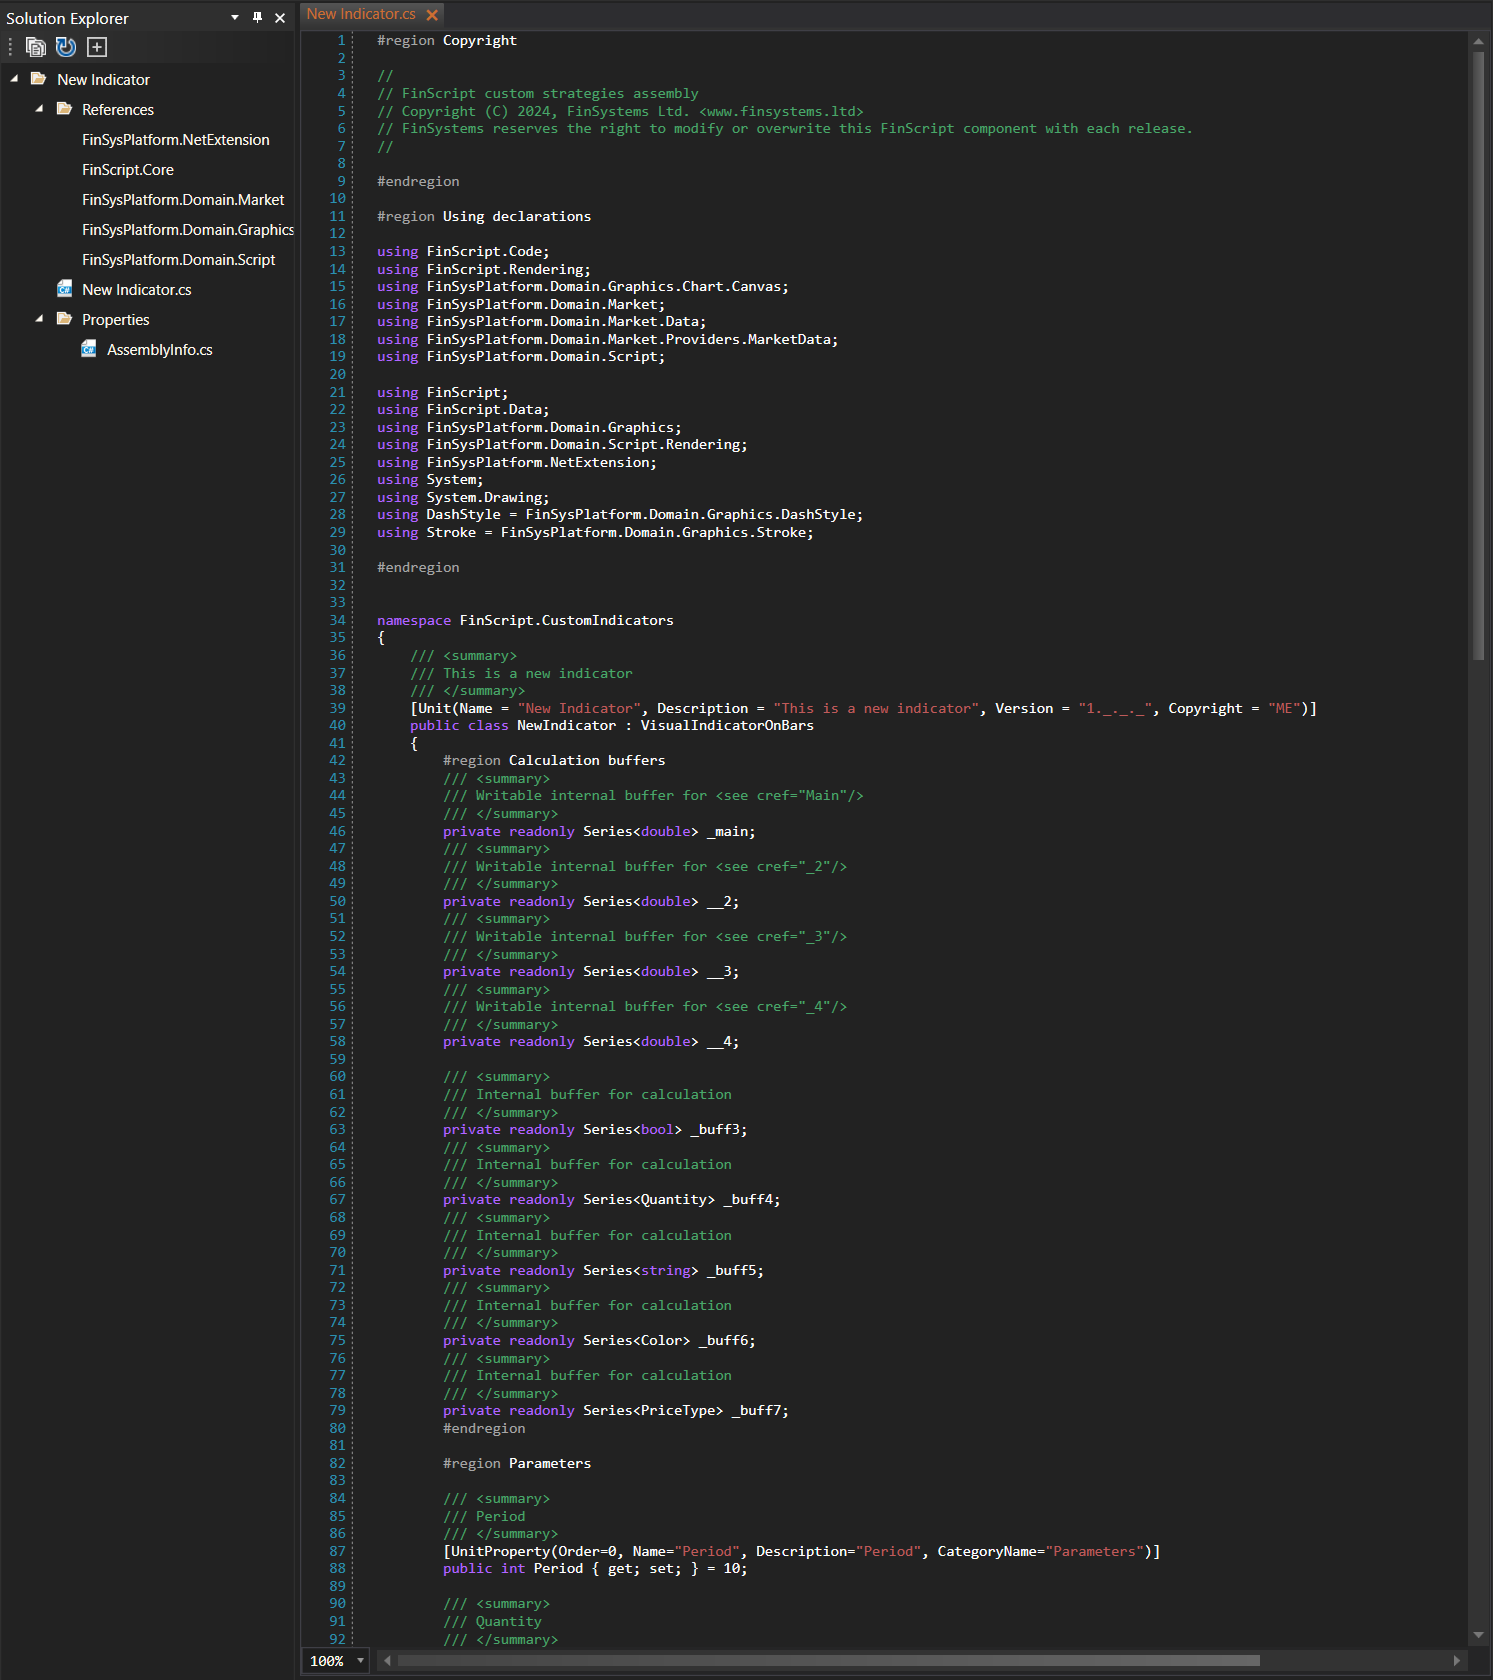
Step 8: Edit Code
After completing the wizard, the code for the indicator is generated and can be edited in the Code Editor. Developers can add custom logic or make further adjustments to the generated code.
Summary
The Indicator Wizard simplifies the process of creating a new indicator by guiding users through a series of steps. Each step allows users to configure specific aspects of the indicator, ensuring that all necessary components are properly set up. Upon completion, the wizard generates the code for the indicator, which can then be edited and customized in the Code Editor. This process enhances productivity and helps developers quickly create functional indicators with minimal effort.