The Input Data tab in the Scanner module settings allows users to select the instruments and timeframes that will be used for scanning patterns. This configuration is essential for both real-time and backtesting modes.
Real-time Mode
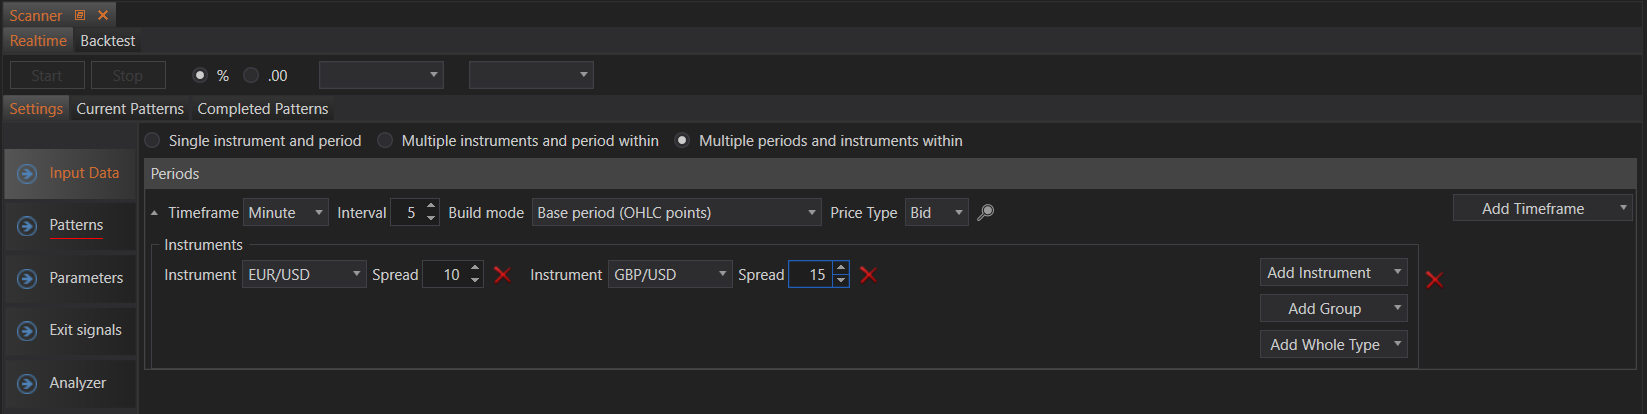
In real-time mode, the Scanner continuously monitors live market data to identify patterns as they emerge. The key elements for configuration in real-time mode are:
- Timeframe: Choose the unit of time for each data point (e.g., minute, hour, day). For example, setting the timeframe to 5 minutes means the scanner will analyze new data every 5 minutes.
- Interval: Set the interval value within the chosen timeframe.
- Build Mode: Select the build mode for the data, such as Base period (OHLC points), which determines how the data is structured.
- Price Type: Choose the price type (Bid, Ask, Last) that the scanner will use for analysis.
- Instruments: Add the financial instruments (e.g., EUR/USD, GBP/USD) that you want the scanner to analyze. You can also add groups of instruments or whole types (e.g., all forex pairs).
- Spread: Set the spread value for each instrument.
Backtest Mode
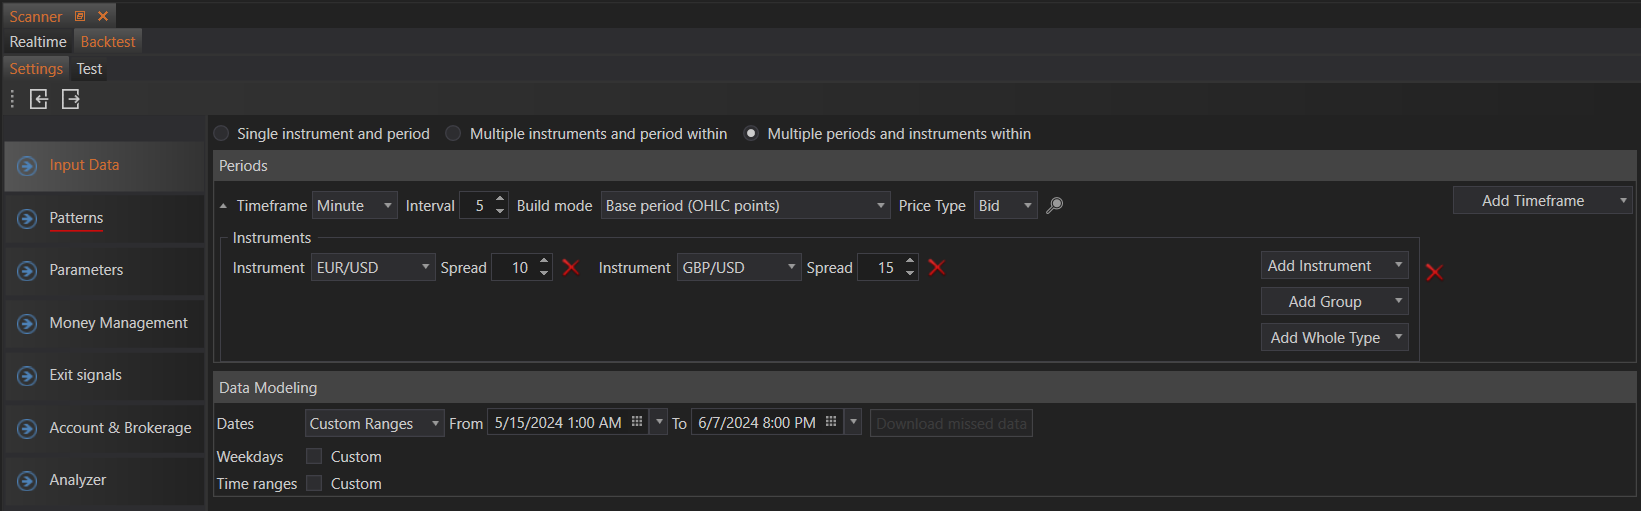
Backtest mode allows users to test their scanning strategies on historical data. In addition to the real-time settings, backtest mode includes options for setting the time range and data modeling:
- Date Range: Specify the historical date range for the backtest (e.g., from 5/15/2024 to 6/7/2024).
- Download Missed Data: Ensure that all necessary historical data is available for the selected period.
- Weekdays: Select specific weekdays if you want to include or exclude certain days in the analysis.
- Time Ranges: Define custom time ranges for each day to refine the periods during which the scanner operates.
These settings ensure that the Scanner module is equipped with the appropriate data for effective pattern recognition, whether operating in real-time or analyzing historical data for backtesting purposes.
For detailed information about configuring the Input Data settings, visit the Input Data page.